Monday 29 November 2010

Books With Bite!

Workloads are starting to ease up slightly, so I'm hoping we're going to be back to business as usual with a Wednesday Surgery this week, and perhaps even the final part of the Illustrator Guide, covering printing esoterica, other miscellany, and the ever-popular Five Lettering Errors That Will Give You Away As A Clueless Noob.


In other news, the Ten Deadliest Sharks graphic novel produced by Discovery Channel and Zenescope's all-ages imprint Silver Dragon, gets coverage on the USA Today website, which is a first for me!


Of course, 2010 has been a rather shark-heavy year for me, what with the artwork restoration and re-lettering on the --ahem-- somewhat less educational Hookjaw for Strip Magazine, which should be hitting the newsstands early next year.


Friday 26 November 2010

If I could direct your attention to…

Still rushed off my feet here at Campbell Towers, but I did want to take a moment to direct your attention to the entirely wonderful Matt Brooker's new book, Timularo.


Matt is better known as his artistic alter-ego, D'israeli, and you'll find a link to his excellent blog under the "Blogs I Follow" header to your right. Tirelessly inventive, constantly experimenting, Matt's open, transparent and lucid discussions of his technique were in no small part the inspiration for this blog.


Well known in the UK as a 2000AD stalwart, providing the art for regular appearances of the strips Lowlife and Stickleback, he's probably better known to American comic readers for a stint inking Marc Hempel in the closing issues of Sandman, or perhaps for his War of the Worlds and Scarlet Traces work with Ian Edgington for Dark Horse. Some may even recall the splendid Lazarus Churchyard, penned by a then-virtually-unknown writer by the name of Warren Ellis…


Those of us with long memories and large comic collections, however, fondly recall the second half of the Eighties and the manifold pleasures of Deadline magazine where, nestled between the barmy adventures of Hewlett & Martin's Tank Girl and the deceptively simple charms of Phillip Bond's Wired World, Timulo was to be found.


Thanks to the adventures of the titular character, some of us have known for many years that Mr Brooker also possesses prodigious talent as a writer and is an admirably handy letterer as well. The strip has been out of print for donkey's years, but Timularo collects all the episodes together and adds a chunk of previously unseen material into the bargain.


Timularo is available from lulu.com and comes thoroughly recommended. Treat yourself for Christmas.


Cheers!


Jim


Edit to add: with impeccable timing, Pete Wells' excellent 2000AD covers blog features a new cover by D'israeli, and includes an informative and fascinating overview of the processes involved in creating it.

Wednesday 24 November 2010

Wednesday Surgery

…is probably going to be Thursday again this week, but will usher in stage one of International Be Kind To Your Letterer Day.


--Or possibly later. I'm flat out this week, but I'll hope to have something new and shiny here before the end of the weekend!--


Apologies for the delay.


Cheers!


Jim

Sunday 21 November 2010

Sunday Surgery: (Not Quite) New Year's Resolution

A couple of days ago, Kyle Jones raised some excellent -- chiefly Manga Studio related -- questions that I thought were worth a Surgery session. I should stress that I don't use MS professionally (yet) but am more of an enthusiastic amateur. As such, I would unreservedly recommend Doug Hills' excellent book Manga Studio for Dummies as, effectively, the missing manual for this package.


Nonetheless, much of what Kyle is asking breaks down to a matter of resolution, about which I do know something.


Counter-intuitively, I'd like to deal with Kyle's last question first, since the answer informs much everything else.


"in Photoshop on my computer it was very difficult to digitally draw and ink anything much bigger than 300 dpi, but since Manga Studio handles larger dpi projects much better (and can easily handle 1200 dpi without slowing down), is there any point of overkill (or is bigger always better)? If one's computer can breeze through the 1200 dpi setting in Manga Studio, is there any reason to go less? (assuming it will ultimately be colored in Photoshop at a lower dpi)?"


This actually hits on something very important. There is an extraordinary amount of rubbish talked about resolution, and Kyle is exactly right when he refers to higher resolution as "overkill". As computers have become faster and hard drive space has become cheaper, there has been an automatic assumption that more is better. The last time I worked on pre-press, I was routinely being sent graphics files from agencies that were 3600dpi and higher.


This is crazy.


There's a very good reason why scanners offer very high resolution options: if you intend to scan an image and then digitally adjust it or scale it, then it makes sense to scan it at actual size but at high resolution, since making adjustments through the preview on a scanner's software interface is so imprecise as to be useless. Better to bring it into Photoshop at high resolution, adjust, scale, make other fine-tuned alterations and then reduce the dpi to the setting you need.


For this reason, comic line art is generally scanned at 600dpi and is (I suspect) the reason why 600dpi is the default resolution for Manga Studio layers.


But, as Kyle notes, the first thing most colourists will do is drop the resolution to 300dpi.


So… what is the ideal resolution for your documents? 


The answer is defined by the quality of the printed product. All printed material that has any kind of variation in colour or tone is made up of dots of ink on paper. The fineness of those dots in printing terms is defined by the screen frequency, which is measured in lines per inch or lpi.


There is a very complicated formula to enable conversion from dpi to lpi in order to work out optimum resolution, but I worked in newspaper and magazine production for ten years, and the rule of thumb which always worked in my experience is that, for an image that is 100% of printed size, optimum dpi = 2x printed lpi.


Old style B&W newsprint was anything from 45-75lpi


Most magazines are 100-120lpi


Really glossy brochures, art books and some high-end magazines might be as high as 150-175lpi.


I would be astonished if there is any comic on the market printing at higher than 150lpi on internal pages, and 175lpi on the front cover, so anything higher 350dpi (call it 400 if you think the artwork might be need to be scaled up at some point) at actual size is nothing more than a waste of hard drive space and CPU clock cycles. 


In almost all instances where the printed product will be colour or grayscale, 300dpi will be more than sufficient. If in serious doubt, find out what the lpi of the printed pages will be, but I'm prepared to bet cold, hard cash on the upper limit being 150lpi.


If you're creating aliased linework (with hard edges, of the kind that Manga Studio produces, for reasons explained in my previous post here) then you should do that at 600dpi -- if you were submitting traditional pen-and-ink work, that's what you'd be expected to scan it at, so it's as well to respect that as a convention. It's also important to note that the lpi to dpi conversion is only applicable to colour and grayscale documents. Absolute black and white is imaged in much more detail and 300dpi is insufficient in these circumstances.


(The two paragraphs above have been revised in line with some sage and timely advice from Mr Todd Klein, for whose input I am most grateful.) 


 "The brushes I had made in Photoshop were modeled after Freddie Williams' suggestions in his book "Digitally Drawing Comics". For instance, he suggested working in a 300 dpi project 11 x 17 inches and doing contour lines at 6 or 8 pixels as a starting point."


I will confess to being mystified as to why anyone would advise creating digital art from scratch on an oversized document -- the only difference it makes is to the Zoom percentages you have to use. In the layout, "pencilling" and "inking" stages, certainly in Manga Studio, I'd work at 600dpi and actual, printed size.


"What would be the millimeters of an 8 pixel or 3 pixel Photoshop brush in Manga Studio (if page size and resolution affects the brushes at all - which touches upon my next questions - then please assume the page size and dpi would be the same in both programs)?"


The resolution absolutely affects this. Pixels are the "d" (dots) in dpi, so the higher the dpi, the more tightly packed the dots and thus the smaller the pixels. Double the resolution and a brush measured in pixels shrinks to a quarter the size:


For reference, that 24px brush at 300dpi measures 2mm across, and 1mm across at 600dpi.


Manga Studio advises a very old-school way of determining "actual print size" on your monitor, which is to create a document and then adjust the zoom percentage on screen until the ruler at the top of the document matches an actual ruler that you hold against the screen. Once you've determined the zoom percentage that matches the real print dimensions, you can set this as the default value the application preferences and zoom to it with CMD-SHIFT-0 (zero):


Note that, dependent upon your own screen size and default resolution, the print size zoom percentage on your monitor is unlikely to be 16.4% -- you need to measure it yourself!


Manga Studio is much better at maintaining live updates of the same document in multiple windows than Photoshop, so it's worth creating two windows for your working document, one that you leave at Actual Print Size and the other that you do all the zooming in and out of, that way you can always quickly refer to how your linework will look on the finished page and ensure that your lines aren't becoming over-fiddly or insanely detailed. If you have a Cintiq or a dual monitor set up, you can keep the print size window for reference on the monitor that you don't use for the main drawing.


(This last hint shamelessly stolen wholesale from Mr Dave Gibbons' Manga Studio 'webinar' which you can see here, and which is well worth 90 minutes of your time.)


Because Manga Studio uses millimetres rather than pixels, MS brushes are the same size regardless of document resolution: 2mm is 2mm, resolution only changes how many pixels are squeezed into those 2mm.


I would genuinely advise trying to let go of the actual measurements of your pens and brushes, and simply worry about whether you're happy with the stroke weights they give at Actual Print Size.


Obviously, if you change the size of your document, then this will affect the size of your brushes and thus your strokes, which is why I recommend working at high resolution and actual size, rather than on an oversize document at lower resolution.


However, if you are determined to work on documents that are larger than printed size, the key thing to remember is that you are dealing with areas and not lengths. If you take a normal comic page and double the side lengths, you have increased the area by a factor of four.


Consequently, if you want to create a document that is twice the final, printed size of a comic page, you need to multiply the side lengths by the square root of two which, as near as makes no difference, is 1.4


Thus, if a comic page (including bleed) is 178mm x 269mm (sorry, US readers, the rest of the world is metric!) and you want to work on a page that is double that, you need to multiply each side by 1.4, to give 249mm x 377mm.


The same is true for brushes -- a 48px brush at actual size would need to be 48x1.4= 67px on a document scaled to two-up.


It's important to stress, though, that the whole point of artists working on oversize pages was originally to enable the artist to create finer strokes than they would be able to if they worked at actual size. The only reason for drawing at half or two up was so that the linework would appear finer when camera-ed down to actual size (and a certain amount of unevenness of line would also be eliminated). If you're going to scale up your brushes, you might as well not bother!


And that -- I think -- pretty much covers it. If any of this is unclear, or raises additional questions, then please use the Comments section to leave feedback and we'll come back to this in a future surgery session.


Cheers!


Jim

Friday 19 November 2010

Magic Wands (Har Har)

(Do you see what I did there?)


Anyway, notwithstanding my new career in stand-up comedy, this is just a quick note to draw your attention to compact but informative interview with DC letterer Steve Wands over on Newsarama.


Cheers!


Jim

Wednesday 17 November 2010

Wednesday Surgery: Time is Fleeting

Just a quick organizational suggestion for Wednesday's surgery. This tip has honestly put about 15-20% on my productivity.


Lettering a page essentially has two parts: the boring part and the interesting part. The boring part involves transferring the text from the script to the Illustrator page, placing the artwork and positioning it correctly. In an ideal world, you could stick all this on an Action, and be done with it but, unfortunately, you can't!


The interesting stuff is the actual lettering, which has pretty much nothing to do with anything of the above.


I can't speak for anyone else, but I find there's a time of day when I'm not at my creative best. For me, it's later in the day -- after eight or more hours sitting staring at that monitor, I'll admit that I start to flag. For many other people, it's the earlier part of the day.


If you have the luxury of planning your work more than a day in advance, then use your less-productive hours to do the part of the job that requires little or no creative thought: prep a whole batch of files so they're ready to letter. Because I do this last thing in my working day, I can have a day's worth of worked prepped and ready to go for the following morning. If you've got a laptop you can do the prep work sitting in front of the TV having a nice glass of wine and pretending to listen to your wife/husband.


Trust me: the pretending to listen to your partner part is solid gold. :-)


Cheers!


Jim

Tuesday 16 November 2010

Lettering In Adobe Illustrator: Six

Part Six: Sound Effects
Sound effects are your friend. Nothing depresses me more than seeing feeble little effects tucked away in the corners of artwork. Treat every sound effect in a script like a Christmas present from the writer!
I'm not one for apologetic sound effects -- I like 'em big and bold, but if you're doing paying work you should probably check with your editor to see how they feel first. At the end of the day, they may not always be appropriate, so check the tone before you go too crazy!
The first thing you need -- obviously -- is a good, all purpose SFX font. In each job, I try to have a default font that I use for all 'standard' FX, to maintain a certain amount of consistency. It's not uncommon to see FX-heavy pages where there are half a dozen or more fonts. I think that would be bad design anywhere else, and I think it's bad design here.
Consequently, I have one font that I use by default for all normal FX in a particular job -- all your KABOOM, BDAM and AAARGHs -- a sharper or harder font for harsher sounds, and a softer one for, you guessed, softer FX. For example, for a particular strip I might try to restrict myself to the following …

I've spent a lot of money on fonts I thought would make a good 'standard' FX font, but ironically Blambot's free Badaboom is as probably good as any to start with!
I have discovered very recently that Tom Orzechowski draws rough SFX onto the artwork with the pencil tool to make sure he gets an attractive arrangement of letters that fits the space available, and then makes a font effect to fit the rough. This is brilliant and I wish I'd thought of it! Going forward, I’ll certainly be trying this.
To take one effect as an example, here are some (hopefully) useful tips on SFX creation.
Normal SFX
There are two basic approaches to creating a sound effect.
Either way, you're going to need to type or paste your basic text.

You can then either use the typographic controls - point size, tracking and baseline shift - to work on the editable text to make the letters look more like a sound effect:


When you're happy with the result, go to the Type Menu and Create Outlines:

Alternatively, you can type your text and go straight to Create Outlines. Either way, the next thing you need to do is go to the Object Menu and select Ungroup:

If you haven't already formatted the text, you can now manipulate the individual letters as shapes using the Selection tool:

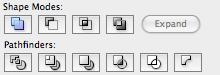
Either way, you will end up with a SFX that you like the look of. At this point, our old friend Pathfinder -> Add Shape to Area makes another appearance:

If you apply a stroke and fill, you will probably find that the results are not pleasing, particularly if you want to apply a heavy stroke:


There is a very quick fix to this. Go to the Appearance palette:


And drag the Fill so that it appears above the stroke:
The result will be much more pleasing to the eye!

It’s very important to remember that this technique is really only good for two or three points worth of stroke weight at most. If you find yourself in need of a heavier outline, then you need to use Path -> Offset Path to create a larger version of the SFX and fill the outer shape with black or the colour of your choice.
Note that if you don't want the letters to appear as part of one shape, but as separate letters:

Then simply don't use the Pathfinder function, but Group the shapes instead.
SFX can quickly be spruced up with a Gradient Fill:


Don't forget that you can change the angle of the Fill:


You can spiff it up still further by adding an inline:

This is also fairly easy:
With your sound effect selected and the Selection tool (V) active, Copy (CMD-C), then Paste In Front (CMD-F)
Initially, you won't be able to see anything, because you've created an exact copy on top of the original.
Change the Fill to 'None' and the result will not be attractive:


However, if you change the Stroke colour to something that compliments the Fill, and reduce the stroke weight to something significantly lower than the original ...


... Then you should get the desired result:


SFX on a Path
Longer SFX can be quickly livened up by running the text along a path.
Draw a curved path the fits on the artwork with the Pen tool:
Select the Type on Path tool:

Click on the path and type or paste the SFX:

Liven it up a bit by closing up the spacing with the tracking, and changing the point size and/or baseline shift values of individual characters:

Once you're happy, you can change to Outlines and tart up however you wish:

Outline/Hollow SFX
Hollow SFX are relatively straightforward, but are very useful when space is tight, since they do not completely obscure the artwork beneath.
At their most basic, you can just create the SFX, turn to outlines, and give it a Stroke but no Fill:
However, this is not always very readable. Expand the Pathfinder group so that it is one path:

Then select 'Outline Stroke' from the Path menu:

This will turn the stroke -- at whatever value you have it set to -- into a filled shape:

You can then apply a Stroke to this new shape:

Again, remember that if you want more than a couple of points of stroke weight, you need to fall back on Offset Path in order to get reliable results.
Masked or Clipped SFX
IMPORTANT NOTE: If you are working on low-resolution or positional artwork, this technique may not be appropriate since low resolution files are not generally detailed enough to draw an accurate mask. If your publisher marries up your lettering files with high-res artwork in the production stage, then they may actively discourage the use of clipping masks, since they require pinpoint precision matching up with artwork and complicate the production process substantially. If you are outputting the final artwork files, then you should be fine, otherwise: check with your editor!


Another very effective way of using SFX in limited space is to mask them, so that they appear to be ‘behind’ certain elements of the artwork, like this:
Art by Matt Soffe

Create your sound effect as normal on the SFX layer and position where you want it:


Using the Pen tool, carefully draw a shape around the SFX. Only the parts of the SFX that are inside the shape you draw will be visible once the masking option is complete. 

Don’t forget that you can always use the Transparency control to change the opacity of the SFX so you can see the part of the drawing below that you’re clipping round.


When you’ve finished, change your SFX back to 100% opacity, make sure your Clipping path is on top of the SFX (use CMD-SHIFT-] to bring it to the front if you’re unsure) and then use the Selection tool to select both elements:

The use Object -> Clipping Mask -> Make (or CMD-7):
And the SFX should now be masked, to show the elements of the artwork that you want to remain visible.

You can make quite complex clipping masks using the Pathfinder operation to combine multiple paths into one mask. In this rather tasty panel from the upcoming Strip magazine:
Art by PJ Holden

You can see that the masking operation is quite complex (you may have to click through to the larger version of that image). In fact, there are three separate elements to the Clipping Mask:

Elements 1 and 2 make up the basic shape, through which the SFX will be visible. These are drawn separately and then turned into a single shape using Add Shape to Area (Make Compound Path also works). However, I realized that I also wanted some of the shrapnel to be visible, so I drew round three bits of shrapnel in Element 3 separately, merged them with Add Shape, and then used Subtract Shape from Area to remove from the combined shape of Elements 1 and 2, effectively making a ‘hole’ in the mask through which the image beneath can show.
Soft Drop Shadows
One word about soft drop shadows.
Don’t.
No, seriously, just don’t. In terms of something like magazine design, a drop shadow can work to lift a design element clear of a page which, by definition, is supposed to be a flat plane.
A comic page is a series of flat images drawn in such a way as to convince the reader that these are people and objects in three-dimensional space. Using a soft drop shadow casts the shadow on a single plane, effectively calling the reader’s attention to the two-dimensional surface of the paper itself. It does not respect the relative distances bewteen the objects in the panel that the artist is trying to convey. At a stroke, a soft drop shadow instantly sucks any illusion of depth that the artist has created from the page and renders it a collection of flat lines.
Here, I've ruined a couple of panels of Chris Askham's lovely Fractal Friction art in precisely the manner I'm describing:


Additionally, the idea of a soft drop shadow doesn’t make any sense since the SFX aren’t tangible objects within the scene; they’re an abstract manifestation of something the medium cannot convey: sound. The idea, then, that they exist as physical objects within the scene, able to capture light and cast shadows is -- excepting the deliberate breaking of the fourth wall -- a complete nonsense.

Don’t do it!